Get ready for a delicious journey with Cozy Chicken Cobbler Recipe, a comforting one-dish meal that combines rotisserie chicken, savoury sauce, vibrant veggies, and a golden, cheesy biscuit crust. Perfect for busy weeknights, it’s a simple and magical meal that brings comforting flavours together effortlessly. With each bite, you’ll experience a delightful blend of flavours and textures, from the creamy filling to the crisp, buttery topping.
Whether you’re cooking for your family, hosting friends, or simply treating yourself, this recipe will surely impress. Join Krill Arctic Foods as we walk you through each step to create this delicious dish, ensuring you have all the tips and tricks to make your Chicken cobbler a successful dish. So, preheat your oven, roll up your sleeves, and dive into the comforting, mouthwatering world of Chicken!
Ingredients For The Cobbler Recipe
- 4 tablespoons salted butter, melted
- 3-4 cups chopped rotisserie chicken
- 12-ounce bag of mixed vegetables
- 10.5-ounce can of cream of chicken soup with herbs (or regular cream of Chicken)
- 2 cups chicken broth
- 1 teaspoon garlic powder
- 1 teaspoon onion powder
- 1/2 teaspoon black pepper
- 11.36-ounce Cheddar Bay Biscuit Mix (reserve seasoning packet for later)
- 2 cups milk (2% or higher)
- 1/2 cup shredded cheddar cheese
- 2 tablespoons salted butter, melted
- Seasoning packet from the Cheddar Bay Biscuit Mix
Instructions For The Cozy Chicken Cobbler Recipe
Preheat and Prepare
Begin by preheating your oven to 350°F (175°C). Transfer the melted butter to a baking dish, tilting the dish to spread the butter evenly.
Layering
Evenly distribute the chopped rotisserie chicken over the melted butter in the baking dish. Sprinkle the frozen peas and carrots evenly over the chicken layer.
Making the Sauce
In a separate bowl, emulsify the cream of chicken soup, chicken broth, garlic powder, onion powder, and black pepper. Gently pour this emulsion over the layers of Chicken and vegetables without agitating the contents.
Biscuit Topping
In the same bowl (rinsed and dried), mix the biscuits with the milk and shredded cheese until well combined. (Do not add the seasoning packet yet.) Without stirring, Pour this biscuit mixture evenly over the other layers in the baking dish.
Baking
Bake uncovered for 50-60 minutes until the top is golden brown and the dish is bubbly. Oven times may vary, so keep an eye on the crust to achieve a light golden brown colour.
Butter Topping
When the cobbler is in the oven, mix the melted butter with the seasoning packet from the biscuit mix in a small bowl. After the cobbler has finished baking, remove it from the oven and evenly brush the butter and seasoning mixture over the top. If desired, sprinkle dried parsley for colour.
Rest and Serve
Allow the chicken cobbler to rest for at least 10 minutes before serving. This helps the filling to thicken slightly, making it easier to serve.
Seafood Cobbler Recipe Variation
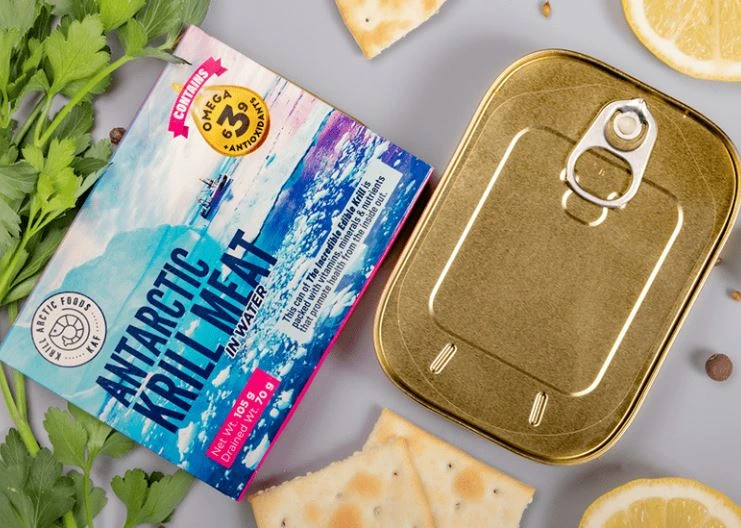
Curious about a seafood twist on the classic chicken cobbler? Try this verified version using krill meat. Krill offers a unique flavour and is packed with nutrients.
Ingredients For the krill filling
- 2 cups cooked krill meat, thawed
- 1 cup frozen peas and carrots
- 1 cup frozen corn
- 1/2 cup diced onion
- 1/4 cup butter
- 1/4 cup all-purpose flour
- 2 cups fish or seafood broth
- 1 cup milk
- Salt and pepper to taste
- 1 teaspoon dried dill
For the biscuit topping
- 1 cup all-purpose flour
- 1 teaspoon baking powder
- 1/2 teaspoon baking soda
- 1/2 teaspoon salt
- 1/4 cup cold butter, cubed
- 1/2 cup buttermilk
Instructions
- Preheat your baking oven to 400°F (200°C). Melt butter in a skillet over medium heat, add diced onion, and cook for 5 minutes.
- Stir in flour to form a roux. Gradually whisk in fish or seafood broth and milk until the sauce thickens.
- Add krill meat, frozen peas and carrots, corn, dill, salt, and pepper to the skillet. Cook until the mixture is heated through, then transfer it to a baking dish.
- Mix flour, baking powder, baking soda, and salt in a bowl.
- Carefully stir in buttermilk until the dough just comes together, being careful not to overmix.
- Drop the biscuit dough over the krill filling in the casserole dish. Bake in the oven for 25 to 30 minutes until the biscuit topping is golden brown and the filling is bubbly.
- Let the cobbler cool for a few minutes before serving. For a nutritious meal, enjoy this dish with a side salad or steamed vegetables.
Serving Suggestions
Chicken Cobbler is a complete meal, but it pairs wonderfully with Asparagus
Green salad
Storing Leftover Chicken Cobbler
Store leftover cobbler in an airtight container in the fridge for 3-4 days. While you can freeze leftovers, note that the topping’s texture may change once thawed. It’s best enjoyed fresh from the oven.
Conclusion
Cozy Chicken Cobbler Recipe is a comforting, delicious dish that brings warmth and satisfaction to any meal. This Cozy Chicken Cobbler Recipe will surely be a hit for impressing your guest. With a golden, crispy biscuit topping and a rich, savoury filling, it’s a perfect combination of flavours and textures.
Frequently Asked Questions
How Do I Know if My Cobbler is Cooked?
Determining if your cobbler is fully cooked is crucial for perfect texture and flavour. Look for a golden brown and slightly crispy topping, indicating the dough is cooked. Additionally, the filling should be bubbly around the edges, showing it’s hot and thickened properly.
Why Is It Called A Cobbler?
The name “cobbler” comes from the dish’s rustic appearance. The topping is often “cobbled” together to resemble a cobblestone street. Historically, early American settlers adapted recipes from their homelands using available ingredients. When they couldn’t make traditional suet puddings, they created cobblers with a biscuit or batter topping, giving us the delicious dish we know today.
How Do I Prevent My Chicken Cobbler From Getting Soggy?
Preventing a soggy cobbler is key to enjoying the perfect dish. First, avoid stirring the layers once they are in the baking dish; this helps keep the topping from sinking into the filling. Ensure your filling is adequately thickened before adding the biscuit topping, as a runny filling can seep into the biscuit layer, making it soggy. Bake the cobbler uncovered to allow moisture to escape, helping the topping to brown and crisp up. Finally, allow the cobbler to rest for at least 10 minutes after baking. This lets the filling set and prevents excess moisture from making the topping soggy.
Can I Use Any Biscuit?
You can use different biscuits for your cobbler, but keep a few things in mind. Different biscuits will impart different flavours. For instance, a cheddar biscuit will add a cheesy note, while a plain biscuit will be more neutral. The texture can also vary depending on whether you use homemade biscuit dough, refrigerated dough, or even biscuit mix, with each type resulting in slightly different textures and tastes. Ensure the biscuit dough isn’t too wet or too dry to ensure it bakes evenly and creates a nice crust.

